Come fare aumento e aumento invisibile di maglie basse all'uncinetto

Potete trovare questo tutorial anche su Spotify
 |
e su Amazon Music

|

Μπορείτε να βρείτε το βίντεο και στο Spotify

αλλά και στο Amazon Music


Μπορείτε να βρείτε αυτό το tutorial και στο

και στο


Potete trovare questo episodio dei miei tutorial di uncinetto anche su


Care amiche e amici ben tornati alle mie lezioni di uncinetto.
In questo episodio, vi faro' vedere come realizzare una diminuzione invisibile di maglie basse. Si tratta di un punto che si usa particolarmente per realizzare Amigurumi.
Ci sono due modi per realizzare la diminuzione di maglie basse all'uncinetto.
In questo video vi faro' vedere uno di questi modi, quello invisibile.
Per realizzare una diminuzione di solito lavoriamo insieme due maglie consecutive passando l'uncinetto sotto le due asole della maglia.
Per realizzare, invece, quella invisibile, facciamo passare l'uncinetto SOLO sotto l'asola anteriore di due maglie consecutive:

Insierire l'uncinetto sotto l'asola avanti della prima maglie e immediatamente, senza fare gettato inserire l'uncinetto sotto l'asola avanti anche della maglia successiva.

Ora abbiamo tre asole sull'uncinetto.
Fate un gettato e passate il filo attraverso le prime due asole che avete sull'uncinetto.
Fate ancora un gettato e passate l'uncinetto sotto le due asole rimaste sull'uncinetto.


e su Amazon Music

Μπορείτε να βρείτε αυτό το tutorial και στο Spotify

καθώς και στο Amazon Music

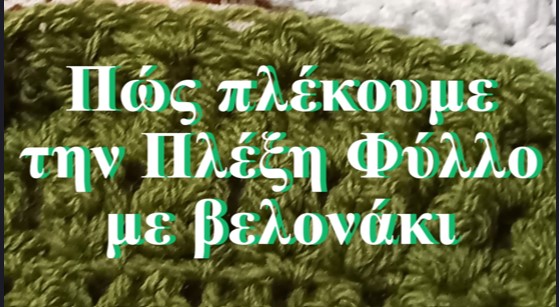
Για να πλέξουμε την πλέξη Φύλλο κάνουμε 4 ποσαράκια ή διπλά ποδαράκια, ανάλογα με το πόσο μεγάλο θέλουμε να κάνουμε το φύλλο. Μπορούμε να κάνουμε και τριπλά ποδαράκια εάν το θέλουμε ακόμη μεγαλύτερο.
Στην συνέχεια, βγάζουμε το τσιγγελάκι απ' την θηλιά στην οποία δουλεύουμε και το τοποθετούμε κάτω από τις δύο θηλιές στο πρώτο ποδαράκι.
Στην συνέχεια επιστρέφουμε στην θηλιά που είχαμε αφήσει ανοιχτή και περνούμε εκείνη την πρώτη θηλιά από τις δύο στο πρώτο ποδαράκι.


You can also find this tutorial on Spotify

and on Amazon Music

Hi all,
in this episode of my tutorials I show you how to crochet small granny which is ideal to make a baby blanket.
You can use both neutral or the classic pink and blue colours.
In order to crochet this granny you can begin by making the ring with the slip knot and 4 chain stitches method or you can begin by making the magic ring.
Then, you work into the circle and make 11 double crochet stitches or if you desire 11 half double crochet stitches.
The third round is made by crocheting the Puff Stitch (after each puff stitch chain 2) while the fourth round is made by groups of 3 double crochet stitches and in each corner crochet 3 double crochet, ch.2, 3 double crochet in the same stitch.

Potete trovare questo tutorial su Spotify

e su Amazon Music

Segui SerenaPaliria su Amazon Music e guarda i nuovi episodi quando diventano disponibili:
------Segui SerenaPaliria su YouTube e guarda i nuovi episodi quando diventano disponibili:
-----------Segui SerenaPaliria su Pinterest e guarda i nuovi episodi quando diventano disponibili
----------- Segui SerenaPaliria su Spotify e guarda i nuovi episodi quando diventano disponibili:
Creations by SerenaPaliria © 2024 All Rights Reserved

You can also find this episode of my tutorial on Spotify:

and on Amazon Music

Hi all anche welcome back :)
Usually, when we fasten off a crochet work we make a slip knot at the end and this leaves a small knot which is not so good looking.
So, in order to avoid this knot we can create a "false" stitch.
In this tutorial I'll show you three techniques to make an invisible join.
In the first two techniques we use a tapestry needle and in the third, in case we don't have a needle at that moment we can use a smaller crochet hook and create this "false" stitch or hide the remaining yarn.
Technique 1
We insert the yarn in the needle and we hold the fabric with the right facing us.
Then
1. we pass the needle under both loops of the first stitch of the round ( insert the needle from the back side towards you)
2. we pass the needle under both loops of the last stitch of the round ( insert the needle from the back side towards you)
3. Insert the needle under the chains made at the beginning of the round
Technique 2
The right side facing you
1. insert the needle under both loops of the first stitch of the round
2? insert the needle under the back loop of the last stitch of the round.
Technique 3
The wrong side facing you.
1. insert the crochet hook under both loops of the first stitch of the round
2? insert the crochet hook under the back loop of the last stitch of the round.
****** --- Follow SerenaPaliria on Amazon Music and watch new episodes when they become available ------Follow SerenaPaliria on YouTube and watch new episodes when they become available -----------Follow SerenaPaliria on Pinterest and watch new episodes when they become available ----------- Follow SerenaPaliria on Spotify and watch new episodes when they become available **** Creations by SerenaPaliria © 2024 All Rights Reserved

You can also find this tutorial on

and on Amazon music

Hi everybody !!!
In this episode of my tutorials I'll show you how to crochet a tiny basket by using the Knit Single Crochet Stitch also called the Waistcoat stitch and the Centre Single crochet Stitch.
In this episode I use the term Single Crochet Stitch and I refer to the US terminology, if referring to the UK terminology is the Double Crochet Stitch.
In order to make the Knit Single Crochet Stitch instead of placing the crochet hook in the usual position we have to insert it in the centre of the stitch where a "V" is visible.
When crocheting in rounds is always the same way but when crocheting in rows we alternate one row of Classic Single Crochet Stitch and the other one inserting the crochet hook into the part of the stitch in which the "V" is visible.

Μπορείτε να βρείτε το tutorial και στο Spotify


Στην συνέχεια σε κάθε γύρο αρχίζουμε με 1 αλυσιδίτσα και κάνουμε τις αυξήσεις θηλιών.
Όταν φτάσετε στο σημείο το οποίο θέλετε να κάνετε την γωνία για να αρχίσετε να δουλεύετε στο ύψος πρέπει να κανετε ένα γύρο με άρριχτα γαϊτανάκια δουλεμένα στην πίσω θηλιά.
Στην συνέχεια πλέκετε την κυρίως πλέξη εναλλασοντας 2 θηλιες "knit άρριχτο" δηλαδή πατώντας το βελονάκι στο κέντρο της θηλιάς του προηγούμενου γύρου, εκεί που σχηματίζει ένα V, και 2 βελονιές με άρριχτα γαϊτανάκια δουλεμένα στην πίσω θηλιά (Back Loop Only Single Crochet Stitch).
***
Ακολουθήστε την Serenapaliria στο Amazon Music
Ακολουθήστε την SerenaPaliria στο Pinterest
Ακολουθήστε την SerenaPaliria στο Spotify
Ακολουθήστε τηνSerenaPaliria στο YouTube
****
Creations by SerenaPaliria © 2024 All Rights Reserved #βελονάκι #τσιγκελάκι #πλέξιμομεβελονάκι


Το Ποδαράκι είναι μια από τις βασικές πλέξεις όταν πλέκουμε με βελονάκι.Η χρήση του είναι πολύ συχνή είτε θελουμε να πλέξουμε κασκόλ, τσάντες είτε θέλουμε να πλέξουμε τα τετράγωνα Granny καθώς χρησιμοποιέιτε πολύ στα filet (φιλέ)
Στο βίντεο αυτό σας δείχνω πώς μπορείτε να το πλέξετε.
Αρχίζουμε είτε κάνοντας τον αρχικό κόμπο και την αλυσιδίτσα είτε με τον μαγικό κύκλο.
Αν αρχίζουνμε σειρά ή γύρο πρέπει να κάνουμε 3 αλυσιδίτσες έτσι ώστε να έρθουμε στο ύψος την βελονιάς
Στην συνέχεια κάνουμε 1 ζετέ, δηλαδή γυρνούμε την κλωστή γύρω από το βελονάκι, τοποθετούμε το βελονάκι μας στην θηλιά που επιθυμούμε και παίρνουμε την κλωστή.
 |
| Ζετέ |
Έχουμε 3 θηλιές πάνω στο βελονάκι μας.
Κάνουμε 1 ζετέ και περνούμε την κλωστή από τις δύο πρώτες θηλιλες που έχουμε στο τσιγκελάκι μας.
Σ'αυτό το σημείο έχουμε 2 θηλιές στο βελονάκι.
Κάνουμε ακόμη 1 ζετέ και περνούμε την κλωστή κι από τις άλλες δύο θηλιές που έχουμε στο βελονάκι μας.


